Tuesday, April 3, 2018

Baked Quinoa Falafel

This recipe is easy to follow, pretty much fail proof and freezes soo well.
I make a double or triple batch and freeze them for super quick meals in the future.
Vegan & gluten free

So right to it per my norm.
If someone wants to know about my life, please feel free to follow me on Instagram or Facebook


Recipe:
  • 1 cup cooked quinoa, cooked in veggie broth (because it makes it tastier than just water)
  • 1 x 15 oz can chickpeas, drained & rinsed (*see note below)
  • 1 medium onion, diced
  • 4 garlic cloves, large & minced
  • 1 cups parsley, packed
  • 1 1/2 tsp salt
  • 2 tsp cumin
  • 1/4 tsp black pepper
  • 2 tbsp sesame oil
  • 1 tbsp chickpea flour (can sub cornstarch here)
  • 2 tsp turmeric powder
  • zest of 1 lemon & 1 tsp lemon juice
  • 2-4 tsp avocado oil *add slowly (can sub olive oil or even water here)
    **chickpea note. Just being real here. REAL falafel uses dry chickpeas, soaked for 24 hours and then just mushed. I personally never prep that far in advance so I tend to just use canned but if I was actually prepared, I would prefer to just soak my own and it would be cheaper as well
Instructions:
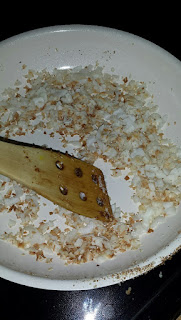
  • in a small pan, heat 1 TBSP oil and cook the onions and garlic until onions are translucent 
  • In food processor combine chickpeas, parsley, onion and garlic until it looks combined and no larger chunks are visible
  • Add in the quinoa, salt, cumin, pepper, sesame oil, flour, turmeric and lemon zest & juice. Mix until forms it looks like dough. *You'll need to use judgement here and add the oil until it is easily shape-able but not too much. It really depends on where you live and how dry your other ingredients were. Sometimes I only need 2 tsp, sometimes the full 4 tsp. Play around with your food here. It should form a ball easily but not be sticky, but you shouldn't have to fight to get it to keep it's shape either....
  • Roll into balls and chill in the fridge for about an hour (if you have time. I never do, but it's preferred) Should make about 12-16 balls. I use a cookie dough scoop to keep them even sized.
  • Preheat oven to 400F. Pop those balls on a parchment lined cookie tray and bake for 30-40min flipping over 1/2 way through. Remove when they are just starting to brown. 
  • Leave on tray for 20 mins to finish (again, if you have time here!)
  • Eat or freeze. These are great reheated and freeze amazingly well

I do mine in a wrap with a BUNCH of salad and then peppers and gauc because that's how I run, but feel free to add your favorite tahini sauce.


Monday, March 26, 2018

Chocolate PB Power Balls


Right to the recipe. I hate blogs that have pages of words and life stories. 
I literally just want the recipes and scroll thru everything else. 
I hope you guys want that too!

If someone wants to know about my life, please feel free to follow me on Instagram or Facebook


Ingredients:
*1/2 Cup Peanut Butter (I used chunky because I accidentally bought it, but typically I would use smooth because that's what we have... it doesn't matter! either would work) *can sub PB for almond butter, or sunflower seed butter
*2 TBSP Unsweetened Almond or Coconut Milk
*1/4 cup quick cook steel cut Oats
*1/4 cup some type of dried fruit. I used raisin, cranberries would be good, or dried blueberries..something without added sugar
*1 1/2 scoops Chocolate Nutrient Dense Powder
*1/4 cup finely chopped nuts. I used almonds but any type of finely crushed nut would work here


Put all ingredients except the nuts in a bowl and mix together well (use your fingers! Get in there!!!)

Roll into balls. I used a cookie scoop to keep them all the same shape


Place the nuts in a shallow bowl.
Roll the balls in the nuts.

Makes about 17 balls (cookie scoop sized)


I keep mine in the the freezer and just grab a couple for my day. Easy peasy. Ready when you are.

Prep time like 10 minutes. Depending on how long it takes you to roll balls :)


You can also press these into cookies and keep in the freezer. Then when your kiddo wants a cookie....
BAM, here it is
Amazingly easy nutritional rich cookie

Monday, March 19, 2018

Tricking the Kiddo!

Sometimes being a parent is like being a prison warden ๐Ÿ™Œ just telling the truth here.

Like how many times do I have to ask him to like actually eat real food? I get it, you love ๐Ÿž who doesn't? CARB addict here! ๐Ÿ‘ˆ

Not that all years aren't important but after birth, the brain really develops and forms in the 1st 12 yrs the most. ๐Ÿ’ชthe brain needs REAL nourishment!!! ๐Ÿด

Soooo I cheat the system (nobody tell Vallyn, I will find you if you do๐Ÿ‘€)
We continue to keep offering well balanced meals knowing that the more he sees something the more likely he is to try it & ๐Ÿ’š it...but like I don't want to be constantly freaking out that his picky eating might be hurting his brain. Like you can't recover from that.

Sooooooo enter the smoothie. ⭐ It's so easy, just a prepared powder you add to H2O and shake. Literally nothing easier. 
He thinks he is getting a treat; I know that he is getting a whole food, nutritionally balanced snack & an organic source of:
๐ŸŽ‰fatty acids
๐ŸŽ‰healthy fats
๐ŸŽ‰calcium & vitamin D for strong bones ๐Ÿ’ช
๐ŸŽ‰fiber & probiotics for healthy digestion ๐Ÿ’ฉ
๐ŸŽ‰vitamin C & E for optimal health & development
๐ŸŽ‰protein for muscle and tissue development ๐Ÿ’ช

And I know what he isn't getting: ๐Ÿ‘Ž GMOs, soy, dairy, gluten, artificial flavors or sweeteners, preservatives, high fructose corn syrup, worthless binders and fillers.

I want him to have a healthy relationship with food when he grows up, so I'm not forcing him to eat things he doesn't want. But until he makes those decisions, I know that I don't have to worry about his nutrition & development. ๐ŸŒฑ

It could be a coincidence that he hasn't had any sick days his 1st year of elementary school ๐Ÿ˜ท or it could be the shakes... ๐Ÿ˜„ My money is on the shakes.

So we'll just sit here and drink to his health ๐ŸŒˆ and enjoy the view of a healthy childhood and a brain full of creativity and knowledge ✌

Sunday, March 11, 2018

Chocolate Nutrient Rich Fat Bombs


YESSSS chocolate + healthy fats + your days supply of nutrients in a candy form?
Who would not want to pop these?
They are the perfect thing to feed a sweet tooth without feeling guilty You are actually doing something good for your body (whatttttt/!?! I know it's amazing)

Right to the recipe. I hate blogs that have pages of words and life stories. I literally just want the recipes and scroll thru everything else.
If someone wants to know about my life, please feel free to follow me on Instagram or Facebook


Melt 1/2 cup peanut butter (can be chunky or smooth. I just happened to have chunky) with 1/2 cup coconut oil

Allow to cool but still be melted

Add in 1/2 scoop Chocolate Vegan nutrient powder and stir. Taste test for desired sweetness. 1/2 scoop is perfect for me but you might want more


Pour into molds. I couldn't find my old candy molds so I used a mini muffin pan. Which was perfect because they looked like PB cups
It made 12 full mini muffin tins

Put in the freezer until solid. Pop out of the mold and eat and enjoy the rich chocolate nutrients while knowing you are basically eating a salad but it tastes like a candy bar. Double score.
(My eyebrows look craaazzzyyy)

 Tower of Nutrition Power!!

Ingredients. Soooo easy just 3 things!!

1/2 Cup Organic Peanut Butter, no sugar added
1/2 Cup Unrefined Coconut Oil
1/2 scoop Vegan Chocolate Nutrient Dense amazing powder

Sunday, April 16, 2017

Gluten Free Coconut Fig Granola Bars

Gluten Free Fig Stuffed Granola Bars
A Tasty little snack, for dessert or breakfast! I choose breakfast, but I like desserts for breakfast.


1st start by soaking the dried figs to re-hydrate. Makes them easier to mix into the ozzy filling :)


 Use your food processor to finely chop toasted nuts


Mix nuts with and dates to blend into a "dough" Press the dough into a 9x9 pan lined with parchment paper. 


Mix the soaked figs with coconut oil and maple syrup into a paste and fill the pan.

Toast up the coconut. Toasted is always better. At least to me.


Press cooled coconut on the top of the fig mix. Pop in the fridge.


Look at these layers of gooey fig jam between nuts and coconut. It is soo good. Slice, eat and enjoy.


Nut layer:
1 cup almonds
1 cup walnuts
1/4 cup cashews
1/4 cup pecans
1/4 tsp salt
1 cup pitted dates
1/4 cup coconut oil

Toast all of the nuts. Let cool. Process with the salt, dates and coconut oil to form a cookie crust layer. Press into the lined pan.


Fig Filling:
2 cups figs with stems removed
1 cup hot water to soak
3 TBSP Maple Syrup
1TBSP melted Coconut Oil

Soak figs in hot water. Drain water. **save the water. it's so good.
Mix with maple syrup and coconut oil into a jam filling


Topping:
1/2 cup toasted coconut.

That's it. Press onto the fig layer and eat :)

Gone Vegan

Important announcement.

Last year I was diagnosed with some serious health concerns.I got put on the AIP (auto-immune protocol) diet to really eliminate food allergens and help discover the route of my problems. It was a LOT of meat. Like by a lot, I mean like every meal was meat and you were encouraged to eat organ meats and drink bone broth. I made it about 3 weeks. It was too much to handle. My stomach does not digest meat in that high of quantities and honestly it got me thinking about route causes being food. How is that really possible?? We have been eating food forever, our bodies thrive on food. What could make us need to eliminate everything? It's hard to chew (literally! pun intended)

So long story short, instead of AIP, I flipped it the other way.
I've been really a flex-itatrian since then.
Mostly Vegan 5-6 days a week and maybe a light meat meal on the weekends with the family. But what was holding me back from fully committing? Easy of buying prepared food? Being able to eat out simpler? Making my family commit with me. My husband cooks a lot of the dinners during the week. He gets home earlier than me. By the time I stroll in the door with my son from daycare, it's literally dinner time. It was just easier to have the hubby cook something and his default is pizza to be honest or really easy prepared and just reheat meals.  Not ideal.

I also work with a lot of girls and get to listen to their health issues on a daily basis; stomach issues, diabetes, overweight, underweight. You name the concern, we probably have it at my job. As a leader, I wanted to help them. Leader doesn't just mean in the office, I wanted to help with their personal concerns. Is it my place to do that?? Probably not but that's just who I am.
We started bringing in group lunches and sharing, having meal prep weekends.. In my effort to better their health, I started watching food documentaries to pick up some cool 1 liner quotes to randomly drop.
Flash forward like 6 months, I'm seeing benefits on their side and it's encouraging so I'm taking it to the next level. Vegan but vegan in the right way. Not the prepared, carb loaded, mass produced "food" that is vegan approved. I'm talking about down to the ground, growing your own food, making food type vegan.
I also have another concern... I don't eat gluten. Celiacs. Also I try to avoid soy. It really messes up my hormones and I've already had a lot of thyroid problems I don't want to flare up.
So a Gluten free- soy free vegan it is!!

From now on, you won't see any recipes involving animal products.
Peace to everyone!

Saturday, February 25, 2017

Onion Corncakes


1st ingredient is to start with a child who keeps buying huge onions from the farmers market.
Now I don't hate onions, butttttttttt I don't really like them at EVERY meal, which is what we are doing right now.  This is a lesson to me. I gave him an allowance each week to spend on a fresh item at the local farmers market. The onions the size of his head have just been a little too appealing.


For real though.
Just a few ingredients and you get a beautiful green pancake type item.


Start by mixing up all the dry ingredients


Add in the finely chopped onions and peppers and mix up.

 pan fry and cook to a beautiful golden brown. Flip and repeat on the other side.

Little trick, spread the batter out as thin as you can. Helps to cook it evenly and caramelize all the onion up.

That's pretty much it. 
Best when warm. I made a huge batch and frozen them and just take out a couple at a time and toast them up. 

I really enjoy with a dollop of salsa on top :)


***RECIPE***

DRY INGREDIENTS:
3/4 Cup Gluten free flour
1 TBSP Sugar
2 TBSP Cornmeal
2 tsp baking powder
2 tsp salt
1 tsp pepper
1 tsp garlic powder

WET INGREDIENTS:
3/4 Cup Almond Milk
2 cups diced onions (about 2 small or like 1/2 a giant one!)
1/2 cup diced bell pepper (about 1/2 a good sized pepper. I used a green one


DIRECTIONS:
Mix dry ingredients together
fold in the wet ingredients until well blended

Heat a skillet to Medium heat. If you have a ceramic like me that can burn sugar and not have it stick, feel free to not oil the pan. Otherwise, I'd add a light layer to the bottom.
Pan fry until golden brown, flip and fry the other side. 

Enjoy while warm or let cool, freeze and pull out a couple and toast them up when needed.